Sunday, December 17, 2023
Cebik Pages Update
Tuesday, October 31, 2023
MacLoggerDX Logs Backup Script
- It gracefully closes MLDX.
- Creates tgz archive (gzipped tar file).
- Excludes .DS_Store, debug files, QSL card images, ADIF conformations log.
- Keeps the last five backups (removes oldest when new backup is created).
Saturday, September 23, 2023
JS8Call Band Hopping Script
Recently someone asked on the JS8Call group about band hopping or cycling through several bands on a 10 minute cycle.
Jordan the author of JS8Call suggested using the API to do this.
I decided to see what was around and found this well documented js8net API library, with that I was able to interact with the API from the command line, and could read and set the frequency.
Python is not something I'm familiar with, so I used ChatGPT to help me write a python script that would cycle through a list of frequencies changing to the next one every few minutes.
The result was JS8BandHop, a fairly simple Python script.
Friday, June 2, 2023
How to build WSJT-X from source on macOS
Xcode
CMake
Homebrew
Mac Ports
Build Hamlib
Build WSJT-X
Other Info
Misc Notes
Thursday, June 1, 2023
MacLoggerDX + Flrig with WSJT-X, Fldigi, JS8Call
How to configure MacLoggerDX and Flrig, with WSJT-X, Fldigi, JS8Call for rig control and one click log uploading to LoTW, QRZ, and Club Log.
Jump to:
- IC-7300 Setup / Network Security / Flrig Setup
- Hamlib NET rigctl Setup / MacLoggerDX Setup
- WSJT-X Setup / JTDX Setup / JT-Bridge Setup / FT8 Op Guide
- JS8Call Setup / Fldigi Setup / More Info.
Summary
My shack PC is an iMac 5K 27" (Late 2015), the rig is an Icom IC-7300. This is how I have it setup in the event anyone else finds it useful! This is a living post that I occasionally update.
MacLoggerDX is a well designed full featured logging application, it expects to own the rig CAT control with features that make use of rig control, and can share control with other applications via built-in DXLab TCP server.
Flrig is a nice rig control program providing control and feedback of most features. This is very useful when remoting into the shack mac, or directly. Flrig must own the CAT control and shares rig control with other applications via a TCP port.
Fldigi is a well featured digital modes application, and supports many keyboard to keyboard modes such as DominoEX, Feld Hell, MFSK, Olivia, PSK31, RTTY, Thor, and more.
WSJT-X / WSJT-X Improved well known for FT8/FT4, I also use it for WSPR on HF, MSK144 and Q65-30A on 6m.
JS8Call / JS8 is a keyboard to keyboard chat mode which uses the FT8 protocol (with its error correcting/decoder tech) as the transport. JS8Call also supports mailbox, relays, position reports and email/sms via APRS (one way).
Problem:
- MacLoggerDX does not support connecting to Flrig, nor can the serial port be shared.
- Fldigi does not support MacLoggerDX's DXLab TCP server as a rig control option.
- There is a work around for PTT control via included Apple script, and options that allow Fldigi to learn the rig frequency/mode via broadcasts from MacLoggerDX.
- The included Apple script for logging from Fldigi to MacLoggerDX didn't work properly for me at least - not sure why.
Solution:
- Flrig owns the CAT control.
- Hamlib rigctld supports connecting to Flrig's xmlrpc server.
- MacLoggerDX supports connecting to Hamlib NET rigctl.
- Fldigi gains full function control via Flrig.
- An alternate Fldigi to MacLoggerDX logging script written in Python.
- The other digi mode apps support Flrig, any that don't likely support Hamlib NET rigctl or the DXLab TCP server built into MacLoggerDX.
Hardware / Software versions as of 22-Jan-2024:
- Icom IC-7300 firmware 1.4.
- iMac 5K 27" (Late 2015), macOS 12.7.4 (Monterey).
- MacLoggerDX 6.50.
- WSJT-X 2.7.0-rc3 Improved (has some features I like).
- JS8Call 2.2.0.
- Fldigi 4.2.05.
- Flrig 2.0.05.
- Hamlib 4.5.5.
 |
| Flrig with MLDX connected, WSJT-X on 17m FT8, and Fldigi decoding end of ARRL digital broadcast on PSK31 (click for larger image - sorry the retina display makes for a large image) |
Icom IC-7300 Setup
macOS contains the Silicon Labs drivers for Icom rigs, plug in the USB cable and it works.
Menu > Set > Connectors:
- ACC/USB Output Select: AF.
- ACC/USB AF Output Level: 25%.
- ACC/USB AF SQL: OFF (Open).
- ACC/USB AF Beep/Speech Output: OFF.
- USB MOD Level: 50%.
- DATA OFF MOD: MIC,ACC.
- DATA MOD: USB.
- CI-V:
- CI-V Address: 94h.
- CI-V Transceive: OFF.
- CI-V USB Port: Unlink from [REMOTE].
- CI-V USB Baud Rate: 115200.
- CI-V USB Echo Back: ON (this should match the echo setting in Flrig).
- USB Serial Function: CI-V.
- USB SEND/Keying:
- USB SEND: OFF.
Network Security!
MacLoggerDX's DXLab TCP server, Flrig's xmlrpc server, and rigctld's TCP server when started bind to and listen on all network interfaces.
Since for simplicity they offer no authentication or encryption system, anything else that can reach the machine over the network can interact with and issue commands to these rig control applications.
Unless you highly trust your local network (anyone and anything else connected to it), and these applications are all on the same machine, it would be recommended to turn on the macOS firewall under System Preferences > Security and Privacy > Firewall and only allow incoming connections specifically as needed. Once turned on a prompt about allowing incoming connections to these applications will be shown, clicking Deny will still allow local machine access via the loopback address (127.0.0.1).
Note: MacLoggerDX is a signed application, the macOS firewall will silently add an exception for it. If the DXLabs TCP server is enabled it will be reachable from the network unless it's set to deny under macOS firewall settings which would limit it to local machine access only.
One way to authenticate and secure the communication for these applications between different machines over untrusted networks would be to tunnel the ports over SSH.
Testing connectivity to TCP ports using netcat (nc) e.g:
nc -zv 192.168.1.100 5003
Flrig Setup
http://www.w1hkj.com/flrig-help - Users Manual
https://groups.io/g/linuxham - Email list/forum
Flrig offers control of various radio functions and displays feedback.
With Flrig and my IC-7300 this lets me control most of the useful front panel controls - volume, NB/NR, ATT, Pre amps, Tuner on/off, output power, and more. Also displays useful information including signal level, Po, SWR, ALC, voltage etc.
The ALC reading is especially useful with digi mode apps to make sure audio drive levels are correct, e.g. no ALC action. SWR is also perhaps equally useful to know that things are working as expected - ALC action can also indicate high a SWR condition as well.
Very useful if you remote control the station, even if it's from another room in the house which I sometimes do.
Configure:
- Xcvr:
- Rig: IC-7300.
- /dev/cu.usbserial-xxxxx.
- Baud: 115200 (matches setting in radio)
- 1 (one stop bit): checked.
- Echo: checked (this setting should match the Echo setting in the rig).
- Rest unchecked.
- Poll intvl: 200 (ms/milliseconds, lower increases Flrig CPU use).
- USB audio: checked.
- Server:
- Xmlrpc port: 5003 (can be anything, I use one higher than DXLab TCP port).
- Poll:
- All options checked except the two disable options.
- Restore:
- Unchecked everything except Use xcvr data.
After configuring, close and re-open Flrig for the xmlrpc port change to take effect.
Hamlib NET rigctl Setup
Needed for MacLoggerDX rig control via Flrig
https://hamlib.sourceforge.net/html/rigctld.1.html
Note: MacLoggerDX can be left disconnected to simply catch the logs which contain all the required info from digi mode apps. When on voice modes (SSB/AM/FM) digi mode apps and Flrig can be closed, rig control given to MacLoggerDX (check box top left on main screen) allowing it can capture and log mode/frequency automatically when manually logging a QSO. If that is sufficient then the rigctld setup is not needed. However MacLoggerDX has features that make use of rig control, and I like to minimize the number of steps/settings etc to do or change when changing modes..
How it works:
- Flrig owns the CAT control.
- Hamlib rigctld supports connecting to Flrig's xmlrpc server.
- MacLoggerDX supports connecting to Hamlib NET rigctl.
Setup:
- Install homebrew - https://brew.sh
- Install hamlib - https://formulae.brew.sh/formula/hamlib - brew install hamlib.
- Run from Terminal: /usr/local/bin/rigctld -m 4 -r 127.0.0.1:5003
- "-m 4" is the rig type (flrig), "-r 127.0.0.1:5003" is flrig's xmlrpc IP:port.
- Configure MacLoggerDX to use Hamlib NET rigctl on port 4532: Port type: Hamlib NET Rigctl, port 127.0.0.1:4532, radio Hamlib NET rigctl.
Here is a script to start Flrig and rigctld, then close rigctld when Flrig is no longer running:
# Launch Flrig
open -a /Applications/flrig-2.0.02.app
# Wait for 2 seconds
sleep 2
# Launch rigctld
/usr/local/bin/rigctld -m 4 -r 127.0.0.1:5003 &
# Monitor Flrig and terminate rigctld when closed
while pgrep flrig > /dev/null; do sleep 2; done
killall rigctld
Save as Flrig-Rigctld.sh, from Terminal run "chmod +x Flrig-Rigctld.sh" to make it executable, and "./Flrig-Rigctld.sh &" to run it in the background (&), allows you to keep using that terminal session.
When I figure out a nicer way, I'll update this. I had tried to wrap the script in an macOS application bundle, but the while loop causes the icon to bounce in the dock forever.
What would be nice is if Flrig supported running shell commands on startup and exit.
MacLoggerDX Setup
https://dogparksoftware.com/MacLoggerDX.html
https://dogparksoftware.com/MacLoggerDX Help/MacLoggerDX Help.html - Online Manual
https://groups.google.com/g/macloggerdx - Email list/forum
Preferences > Station:
- WSJT-X checked.
Preferences > Radio:
- Port Type: Hamlib NET rigctl.
- Port 127.0.0.1:4532.
- Radio: Hamlib Net rigctl.
Lookup and Logging Services
Preferences > Lookup > QRZ XML:
QRZ Logbook Upload API Key - QRZ forums.
The QRZ logbook can sync with LoTW to pull in confirmations.
Preferences > Look Up > Club Log:
Club Log among other things is good for tracking your progress, and requesting QSL cards if the op enables OQRS etc. Setup is simple, input your username and password, uncheck Show in comments (unless you want the date/time of the Club Log upload to be added to the comments).
Club Log can sync with LoTW to pull in confirmations.
Preferences > Look Up > LoTW:
Location name same as setup in TQSL.
Note: The location is useful for example if operating portable to activate a grid on 6m, setup the location in TQSL. Locations button under the Station tab can be used to manage different locations, or manually update grid on the Station tab, and the location name under Lookup > LoTW. Stations Prefs in the MacLoggerDX manual covers this.
Password is not needed unless one was set for the location in TQSL.
https://www.arrl.org/tqsl-download
It can take up-to a few minutes before the log entries appear in your QRZ logbook and LoTW.
One Click Log Uploads
For these Look Up and logging services, you can also enable the option to upload in real time for each or some. This removes of burden of constantly having to select and upload new log entries. If unsure about a log entry, uncheck Upload QSOs in Real Time (the main option above the different lookup tabs switches it on/off for all), log it, then decide what to do.
In WSJT-X, JTDX under Preferences > Reporting > Prompt me to log QSO, when checked a prompt to log the QSO will appear when RR73/73 are sent/received as the QSO is completed. If real time log uploads are enabled in MacLoggerDX, one click and the QSO is logged and uploaded to the configured services.
Switch from UDP unicast to multicast
When more than one application will be consuming UDP packets, e.g. when WSJT-X and JT-Bridge are running together, switch from using a UDP unicast address (127.0.0.1) to a multicast address (224.0.0.1), open Terminal and run:
defaults write com.dogparksoftware.MacLoggerDX wsjtx_multicast_group "224.0.0.1"
For more info see
https://dogparksoftware.com/MacLoggerDX Help/mldxfc_wsjtx.html search the page for "multicast".
In WSJT-X, JS8Call, and JTDX > Reporting tab > UDP server, change 127.0.0.1 to 224.0.0.1
Band Plans
One annoyance I found with MacLoggerDX are its band plans (Preferences > Band Plan), if you go "out of band" to a "non-standard" FT8 frequency for example, then touch anything in MacLoggerDX it'll change modes on you to RTTY or CW - pretty annoying!
Fix is to edit/remove the CW and RTTY sub-bands, and add sub bands for USB-D mode to cover where you're likely to use digi modes.
iCloud Drive
The MacLoggerDX manual FAQ section recommends disabling iCloud Drive Documents and Desktop syncing.
I make use of iCloud Drive for my Documents, disabling it is not an option. I found that MLDX might be placing locks on some of the files it uses in the Documents/MLDX_Logs folder, this would cause syncing problems with iCloud Drive Documents where it would not always upload/download reliably and keep everything the same across multiple machines.
The work around I found was to rename MLDX_Logs to MLDX_Logs.nosync then create a symbolic link to it with the original folder name.
With MLDX closed, open terminal and run:
iCloud Drive will ignore any file or folder names ending in .nosync, while it will sync the symbolic link, it doesn't do anything with files/folders the link points to.
To make a backup copy of the MLDX_Logs and store them in iCloud Drive, create a new folder in Documents called MLDX_Backup, close MLDX and periodically copy the contents of MLDX_Logs over to it, or rely on Time Machine backups, or both.
MLDX Backup is a script I wrote and use to create backups into a backup folder under Documents which iCloud Drive syncs.
I still find on occasion the iCloud Drive syncing gets out of step the service can be restarted by running: killall bird
The process will then automatically restart, and everything gets caught up.
WSJT-X Setup
https://wsjt.sourceforge.io/wsjtx.html
https://wsjt-x-improved.sourceforge.io - WSJT-X Improved
Preferences > General:
- Decoded Text Font: Andale Mono 14 (nice easy font to read).
Preferences > Radio:
- Rig: Flrig.
- Network Server: 127.0.0.1:5003.
- PTT Method: CAT.
- Mode: Data/pkt (sets rig to USB-D and wide filter - should be 3000 Hz).
- Split Operation: Fake it (WSJT-X will move the TX freq of rig so the audio is not passing near the filter edges).
Preferences > Audio:
- Input: USB Audio Codec, Mono.
- Output: USB Audo Codec, Mono.
- Remember settings by band: Both unchecked.
Preferences > Reporting:
- Enable UDP requests, UDP Server 224.0.0.1 port 2237.
- Checking Prompt to log QSO will auto prompt to log it when WSJT-X sees/sends RR73 or 73. If MacLoggerDX is configured to auto upload, then QSOs are uploaded in real time as they are completed.
WSJT-X Audio Levels
Receive: On quiet band with no signals (e.g. 10m or 6m tuned away to a quiet spot), adjust AF output in rig and/or macOS sound device sliders (if supported) to show 30 dB. This is what the WSJT-X user guide suggests under section 5 Transceiver Setup > Receiver Noise Level.
When I've seen weak signal ops (160m and below, 6m and above) discussing receive levels, For FT8/FT4 they recommend setting the level to show 60 to 80 dB, and AGC set to fast for best performance. With the FT modes and ~60 dB, the quick and short reason is weaker signals will be with-in the dynamic range of the A/D converter, at 30 dB they wont be.
For MSK144 and Q65 I've seen 30 dB and AGC off recommended.
The setting to adjust in the IC-7300 is ACC/USB AF Output Level.
Clipping and over driving in the receive audio chain can also occur, be aware of that.. I had a local telling me on 6m FT8 I had harmonics all over the band with a screen shot to prove it (it looked awful), after some tests with another local said it was clean, if the issue was my transmit levels then everyone should see the problem.
What do I use? Currently 60 dB and AGC fast (0.1s) is the default I leave things set to, adjusting them for MSK144 and Q65 as needed (memory permitting).
Transmit: Detailed document FT8 - Avoiding Harmonics and Audio Settings by W9MDB. Recommend reading and working through the document as it goes into good detail, including understanding ALC behavior which varies with different radios. This post by Bill G4WJS (SK) also talks about ALC.
Basic steps for reference:
- Rig RF Power set to 100% or max it is capable of for the duty cycle.
- WSJT-X Pwr slider set to 100% or 0 dB.
- WSJT-X Audio Settings > Mono.
- Applications > Utilities > Audio MIDI Setup > check/set rig audio (e.g. USB CODEC) format is 1 ch 16-bit integer 48.0 kHz for both mic/speaker (in/out).
- Operating System sound level slider for the rig's audio interface set to 0% - System Prefs > Sound > Output > select rig's audio device > adjust Output volume slider minimum.
- Click Tune in WSJT-X.
- Raise the OS sound level slider until ALC action occurs then back it off until zero ALC action, this should also be full RF output or very close.
- Re-select the speakers in System Prefs > Sound which sets the default output device for other apps and system sounds.
- RF output is now fully controlled via the slider in WSJT-X.
- Dropping Pwr slider in WSJT-X to -3 dB should half the RF output, -6 dB should be about 25%. I found this varies between bands with my IC-7300.
WSJT-X Frequency Calibration, and Waterfall Flattening
Optional, but nice to do.
https://lonneys-notebook.blogspot.com/2022/06/wsjt-x-freqcal-waterfall-flattening.html
CTY.DAT
WSJT-X includes cty.dat (Country data), this helps map callsigns to their actual locations/entity.
WSJT-X Improved 2.7.x (rc) has an option to download cty.dat in Preferences > Colors tab.
Otherwise updated cty.dat files can be placed in the log directory:
https://www.country-files.com/contest/wsjt-x
Big CTY: https://www.country-files.com/category/big-cty
The Big CTY file will also work, tested this with a KL7 station located in Oregon. They were calling CQ with CN84 grid, WSJT-X showed their entity as Alaska, checking QRZ showed they were located in Oregon/CN84. After dropping in the big cty.dat file into the log directory and restarting WSJT-X their entity was correctly shown as USA.
Q65 on 6m
Some notes on configuring and using Q65 on 6m for EME, terrestrial, and auroral scatter.
https://lonneys-notebook.blogspot.com/2022/04/try-out-6m-q65-eme-or-terrestrial.html
Build WSJT-X from source
WSJT-X can also be built from source on macOS.
https://lonneys-notebook.blogspot.com/2023/06/how-to-build-wsjt-x-from-source-on-macos.html
JTDX Setup
https://sourceforge.net/projects/jtdx/files
https://jtdx.freeforums.net (Support forum)
JTDX is an alternative to WSJT-X for some modes. Basic configuration is essentially the same as WSJT-X in JTDX v2.2.159.
I like consistency..
I was able to make the color coding match by having both WSJT-X and JTDX pref windows open, and use the eye-dropper tool to match the colors.
JTDX uses the same two log file names wsjtx.log and wsjtx_log.adi, one of the things these are used for is color coding what entities/stations/bands you've worked or not.
If like me you want to have the luxury of being-able to switch between these two apps have it all match up and be the same, this can be done by creating two symlinks:
- From JTDX, File > Open Log Directory, quit JTDX.
- Delete/move/rename wsjtx.log and wsjtx_log.adi
- These files can also be merged into the ones used by WSJT-X by removing duplicates and combining them if you want to get it all into one place.
- Open Terminal, change to the JTDX log directory, and create the symlinks:
- cd ~/Library/Application\ Support/JTDX
- ln -s ../WSJT-X/wsjtx.log wsjtx.log
- ln -s ../WSJT-X/wsjtx_log.adi wsjtx_log.adi
- ls -l will show where the symlinks point:
wsjtx_log.adi -> ../WSJT-X/wsjtx_log.adi
JTDX's S meter and Output power options (enable on the Radio settings tab) also work (displayed top right corner) when using Flrig for CAT control.
JT-Bridge Setup
JT-Bridge is the Mac equivalent of JT-Alert. This tool becomes increasingly useful as you need to start looking for countries, states, or grid squares that are hard to get or have not yet been logged and confirmed, this helps filter all band activity down to what you're looking for or need by syncing with the MacLoggerDX log. As QSOs show confirmed in MacLoggerDX by running Log > LoTW Confirmations, JT-Bridge is kept in sync by running File > Sync with Logger.
Preferences > Network:
- Multicast Group: 224.0.0.1.
- Port: 2237.
- Listen on port (leave empty).
There is also GridTracker, but I have not gotten into using it yet.
Stress Test FT8
https://jp1lrt.asablo.jp/blog/2021/06/25/9391328
With WSJT-X v2.5.4 I get 58 decodes, with JTDX defaults 62, and after tweaking the settings 68. My Late 2015 iMac has a 4 GHz Quad Core i7-6700K CPU - this was the highest CPU option available in these at the time!
On busy bands CPU performance makes a big difference. Further discussions I've seen also indicate more memory helps. If we want the bleeding edge of performance out of the FT modes then max the CPU and memory options, close all unnecessary applications etc.
Since WSJT-X v2.6.0-rc became available for testing, it's very close to JTDX defaults with the number of stations decoded each cycle, sometimes a few more, a few less, but always fairly close from what I've seen.
With the sample file and WSJT-X 2.6.1 I get 67 decodes, but I've seen as many as 103 on a busy 10m band (many JAs calling a V26 station) - that above file may not be the ideal test of the decoder performance? Perhaps what we need are set of test files better suited to use as benchmarks for WSJT-X.
Maybe we can squeeze a little more decoder success by renicing WSJT-X or JTDX to give it a higher priority?
I have used htop (brew install htop) to renice the WSJT-X jt9 process to -20 (maximum, yes less is more) - jt9 process appears to be doing the decoding as it spikes in CPU use during the decodes at the end of each FT8 sequence, wsjt-x process is the rest of the application from what I can tell, its CPU use increases when menus and options are clicked/changed etc
FT8 Operating Guide
https://www.g4ifb.com/FT8_Hinson_tips_for_HF_DXers.pdf - highly recommended reading!
JS8Call Setup
http://files.js8call.com/latest.html
https://groups.io/g/js8call - Email list/forum
Basically the same as WSJT-X, except the radio tab has two sub tabs - CAT Control and Rig Options. TCP server and port address is set under CAT Control but confusingly appears as a greyed out unchangeable option under Rig Options!
Preferences > Radio:
- Rig: Flrig.
- CAT Control tab > Network Server: 127.0.0.1:5003.
- Rig Options tab:
- PTT Method: CAT.
- Mode Data/Pkt.
- Split Operation: Fake it.
- TX delay 0.2 s.
- Hold PTT between frames (checked).
Preferences > Audio:
- Input: USB Audio Codec.
- Output: USB Audo Codec.
- Remember settings by band: Both unchecked.
Prior to MLDX v6.46, in JS8Call if the UDP port was changed to 2237 under the Reporting tab, logging a QSO in JS8Call would also send the log to MLDX the same with WSJT-X, but WSJT-X changed the API and MLDX was updated to suit, which broke this functionality with JS8Call.
Since this change, log a QSO as per normal in JS8Call, then open the logs directory Log > Open Log Directory, right/control click the js8call.adi file > Open With > MacLogger DX to import any new QSOs from the ADI file.
I got into JS8Call a while back because I was interested in APRS over HF. I also enjoy the keyboard chat modes too.
Fldigi Setup
https://wikipedia.org/wiki/Fldigi
http://www.w1hkj.com - Downloads
http://www.w1hkj.com/FldigiHelp - Users Manual
http://www.w1hkj.com/beginners.html - Beginners guide to Fldigi
http://www.w1hkj.com/modes - Sights and sounds of digi modes
https://sourceforge.net/p/fldigi/wiki/osx_howto/ - How to compile Fldigi on macOS
https://groups.io/g/linuxham - Email list/forum
Configure:
- Operator-Station:
- Fill in as required.
- Station Locator: <input 6 character grid>
- Call > Lookup:
- Database lookup: QRZ.com, enter QRZ user/pass.
- Misc > PSK Reporter (check):
- Automatically spot callsigns in decoded text.
- Send reception report when logging a QSO.
- Report rig frequency.
- Logon to pskrep when starting Fldigi.
- Note: 6 character grid is required under Configure > Operator-Station > Station Locator
- Click Initialize.
- Soundcard > Devices:
- PortAudio: Checked.
- Capture: USB Audio Codec.
- Playback: USB Audio Codec.
- Device support full duplex: Checked.
- Rig Control > Flrig:
- Enable flrig xcvr control with fldigi as client.
- Poll Interval (msec): 200.
- Flrig xmlrpc server: 127.0.0.1:5003.
TX Audio (adjust for zero ALC) and WF levels, bottom of Fldigi main window:
- WF Uppser Signal Level (dB): -40 (0 if level set for 60 dB in WSJT-X).
- WF Signal Range (dB): 60.
- TX Level Attenuator (dB): -8.
Logging
The _Log2MLDX.scpt included with the MacLoggerDX disk image didn't work properly for me.
Logging on MacLoggerDX with Fldigi is a Python script I found searching the MacLoggerDX Google group, it works perfectly.
The Nov 27, 2022 version uses an ADIF import, after clicking the macro button in Fldigi, MacLoggerDX will prompt to import the file and add it to the log, however MLDX will not auto upload imported logs (if this is enabled/used).
After an email with Fred it sounds like a future update may include UDP as an option again to eliminate the import prompt from MacLoggerDX.
Previous Setup?
If Fldigi was previously setup to work with MacLoggerDX using the work arounds, these can be undone:
- PTT script can be removed from being auto started when Fldigi starts.
- In MacLoggerDX > Prefs > Station, UDP Broadcast can be unchecked.
- In Fldigi > Config > Logging > MacLogger, Connect to MacLogger can be unchecked.
More Info
70 Years of Amateur Digital Modes - pretty interesting !
DominoEX and DominoEX FAQ.
Data & Text mode Digital Radio Communication - VU2NSB.
Feld Hell Club - Info about the mode, frequencies, and nets.
FSQ (Fast Simple QSO) - Info about the mode and frequencies.
Monday, March 27, 2023
Central Machinery 8" Press and WEN Vise (that fits)
Wednesday, March 8, 2023
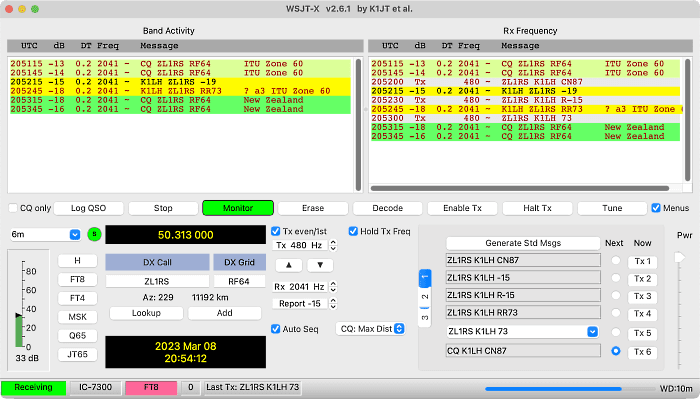
ZL on 6m from Pacific North West
Monday, February 6, 2023
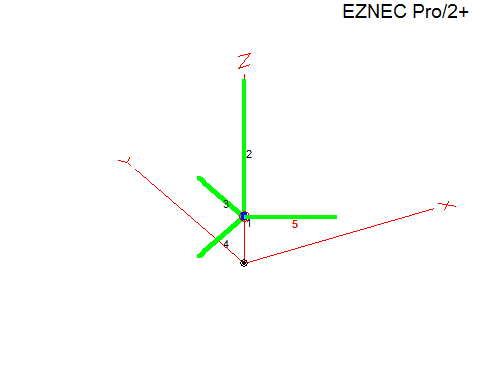
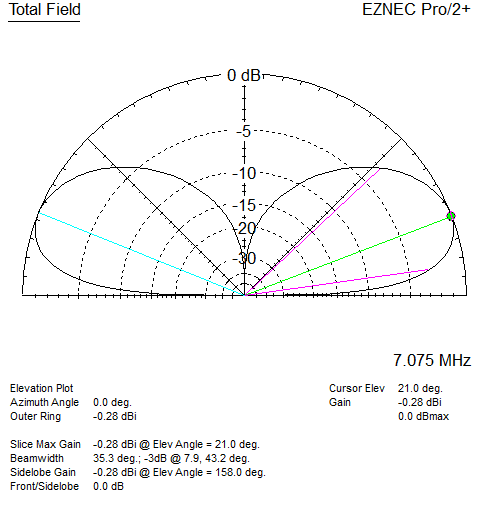
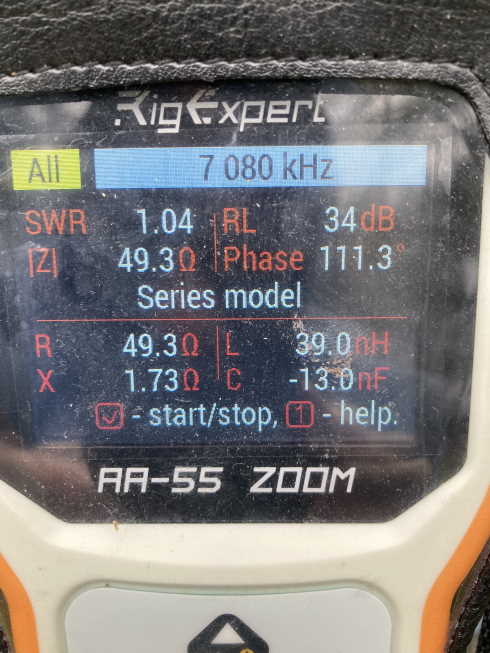
40m 1/3 Wave Elevated Vertical 50 Ohm
Sunday, January 22, 2023
40m 2 Element Delta Loop
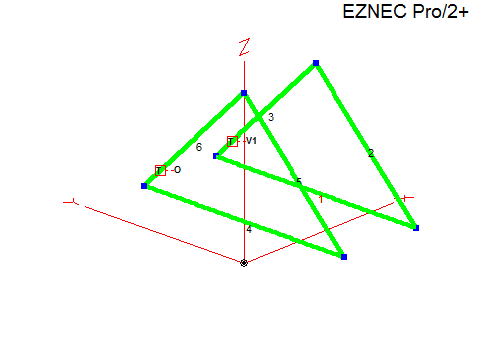
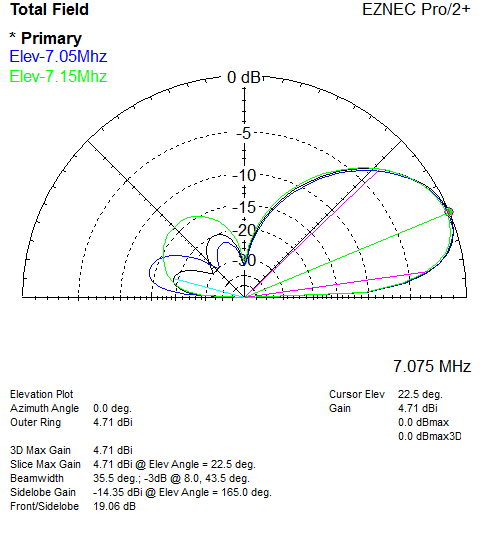
Parasitic (driver + reflector), reversible, direct 50 ohm feed, equal length 75 ohm sections for matching and the open stub long enough to reach a common switching point.
Recently during the middle of the day I noticed a local station here on the US west coast spotting EU stations on 40m FT8 via psk reporter. This is fairly unusual due to day time D layer absorption, but not impossible. I emailed asking for more info about the antenna they were using, they replied saying they had built a two element delta loop array based on 40 Meter Parasitic Delta Loop Array by W8WWV.
Trying to model this by hand in EZNEC the results were not great, especially trying to get a 50 ohm match. Since there are interactions with element spacing, resonance, etc - change one thing it throws off several others.
Decided to give this problem to the optimizer in AutoEZ. Optimizing for gain and direct 50 ohm feed, I let the optimizer adjust the length of the bottom wire, the height of both loops, and the feed positions symmetrically, and vary two equal lengths of 75 ohm coax for the open stub and matching section to keep it simple.
I was pleasantly surprised when AutoEZ found a perfect solution using two equal length sections of 75 ohm coax that will easily reach a common point, and provide a direct 50 ohm feed!
Searching around for information on designs using switched open stubs, there are a few which use 3/8 λ open stub for the reflector.
Interesting to note, the starting model I had used equilateral triangles (what I happened to have), the optimizer settled on right angle triangles (very close at 89 degrees). Agrees with accepted wisdom for vertically polarized deltas, see SCV Polarized Wire Antennas: The Delta Branch - L.B. Cebik.
On to the details..
Item | Measurement |
Horizontal wire height above ground | 3 m / 9.8 ft |
Horizontal wire length | 18.28 m / 60 ft |
Height to apex above ground | 12.31 m / 40.3 ft |
Side wire length | 13.04 m / 42.78 ft |
Element spacing | 7 m / 23 ft |
Feed position up side | 16.3% or 2 m / 6.5 ft |
75 Ω coax length from each element | 13.74 m / 45 ft (VF=1) |
Each 75 ohm line meets at a common point:
- 75 ohm line connected to the driver matches the system to 50 ohms.
- 75 ohm line to the other element is left open circuit resonating it as a reflector.
- Direction reversed by swapping which is open and which is connected to the driven element.
With the 75 ohm lines being equal lengths and one is open circuit, the switching network/relay wiring is kept simple.
Current chokes at each loop feed-point: With the VF of the coax used measured and taken into account, there should be enough excess length to use for a current choke (winding it around ferrite) at each loop feed-point (the choke must preserve the line impedance and electrical length), and to reach a common point for switching.
The model uses bare 12 AWG copper wire, and VF of 1 for the 75 ohm coax. The model would need to be updated if using insulated wire and re-optimized, the VF of the coax being used would need to be measured with an analyzer and length multiplied by that number (e.g. 0.8 or what ever it is) to get the electrical length.
As a test when I updated the model using RG-11 factoring in VF and loss figures, there is a small 0.3 dB or so drop in gain, this will be partly from the SWR on the matching section and the effect of the open stub causing small losses.
Now if only I had the room to build it :-)
EZNEC and AutoEZ model files: 40m 2 Element Delta Loop.
