Summary
The GM 4T65-E transmission was produced between 1997 and 2011 and was used in many GM FWD vehicles with the Buick 3800 Series II V6 which is arguably one of the best engines ever made, but that is another story ..
One of the most common problems is the P1811 code or 'hard shifting' after the transmission and engine reach normal operating temperature. Usually after coming to a stop and moving off again. My 2002 Chevy Impala happened to have this problem, which surfaced after I had the dirty transmission fluid flushed - is seems the dirty fluid hid this issue.
- The problem is often caused because the bores in the accumulators become too smooth and the rubber seals in the pistons will grab or bind up when the transmission fluid is hot.
- This causes a long shift which is detected by the computer, to compensate the line pressure is increased. Mostly as a fail safe to prevent slipping clutches from burning up for example.
- The result is very hard gear shifts, especially 3rd to 4th when the torque converter is locked up.
- There are other causes of the hard shifting from things like a faulty MAF sensor, to faulty shift solenoids among other things, servicing the accumulators is not much more work than doing a fluid/filter change (which is probably overdue anyways) then you can at least rule this out.
There are two options, one cheaper than the other:
- Cheap and nasty option is drop the pan, remove the accumulators, scuff the bores, change the filter & put it all back together. Refill with BrandX Dex III ATF and call it a day.
- The more expensive route is to also install a shift kit while we're in there & replace gaskets and seals in the accumulator, refill the transmission with Dexron VI or Allison Transmission TES 295 ATF fluid.
Parts & Fluids
Following the more expensive route this is what you'll need:
- 4T65E Shift Kit Combo Kit from Triple Edge Performance. Everything you need, this is what I got.
- ZZPerformance also sell a 4T65E Shift Kit.
- Allison Transmission TES 295 approved fluid. If you cant find the real stuff locally stocked anywhere, Amazon currently (09-Jul-13) sell Mobil Delvac in a 1 gallon pack and a 4 pack containing 4 gallons. Qualified for free shipping when I ordered the 4 pack.
- Brakleen - used to clean the parts removed - it leaves no residue and should mention this on the can.
- I found one can was only just enough for cleaning the pan, accumulators and those aluminum pipes. I would suggest two cans. This stuff is pretty toxic, spray the parts down outside away from everything into another plastic pan.
- List of tools to be added.
- Some gloves probably a good idea too.
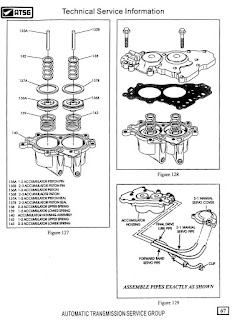
The TransGo shift kit also includes parts that can only be replaced during transmission rebuild. The first side of the info sheet as shown above is only relevant when doing this fix on the accumulators.
Why TES 295
I spent a number of hours researching automatic transmission fluids and this is what I found:
- All Dexron-III licenses expired permanently at the end of 2006, and GM now supports only Dexron-VI fluids for use in their automatic transmissions, it is backward compatible with Dexron-III.
- Fluids asserted by their manufacturers to meet Dexron-III standards continue to be sold under abbreviated names such as Dex/Merc, but the licensing system no longer exists. These fluids are not regulated by GM.
- Allison Transmission TES 295 is a good replacement for transmissions specifying Dexron-III. It exceeds the specification, doesn't lose viscosity with age or oxidize as easily as Dexron-III. It is also rated to -54 °C, desirable here in Fairbanks Alaska where winter temps range from -20 °C to -50 °C.
- If you don't want to spend a bit extra then go for Dexron-VI.
- TES 295 and Dextron-VI work out cheaper due to extended drain intervals.
- Former Allison Transmission Fluids Engineer answers question about TES 295. This is where I got most of the info about TES 295 from, there are about 60 pages of posts so I mostly skimmed over them reading the replies from Tom (hzjcm8).
The Procedure
Most of the information is borrowed from these forum posts, so the credit goes to these guys for writing up what they did:
http://www.gmforum.com/4t65e-hd-147/installing-shift-kit-4t65-hd-transmission-279684/
http://ls1tech.com/forums/ls4-performance/1311880-trans-go-shift-kit-installed-first-impressions.html
http://ls1tech.com/forums/ls4-performance/628840-shift-kit-install-very-detailed-56k-go-watch-movie.html
http://www.w-body.com/showthread.php/32132-4T65E-Do-It-Yourself-Shift-Kit-Instructions-and-Install-Guide
- Ideally you'll want to do this when the transmission fluid is hot. In my case it was a 20 mile drive to my wife's parents place where her dad helped me do this - so the fluid was good and hot. I left the car idling while we got everything ready.
- The ramps we had were too high for the low plastic bumper, so we jacked the car up with a trolly jack, and placed 2 axle stands under the sub frame, and two where a jack normally goes when changing a tire.
- I placed a big piece of cardboard under car, and the large plastic tray that can hold at least 4 to 6 gallons so it's not too full when it's time to move it.
- DISCONNECT THE BATTERY NEGATIVE LEAD!
- Images are from different places, they are not all from the same car, so things look different in some of them, but the transmission it self is the same.
Dropping The Pan
- The pan bolts are 10mm. Carefully loosen each pan bolt, then at one corner loosen them more - I did this on the front middle corner.
- You may need a flat screwdriver to carefully pry the pan open - do not leaver against the soft aluminum.
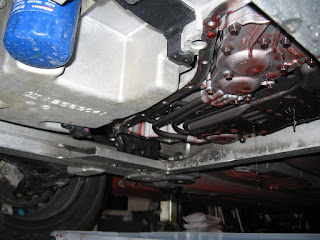
- Once the fluid starts to flow you can carefully undo the bolts to drop one corner down more to let the fluid out.
- Once it's mostly out hold the pan up, remove the bolts (put them in a cup for safe keeping), then tip the rest of the fluid out of the pan into your plastic tray.
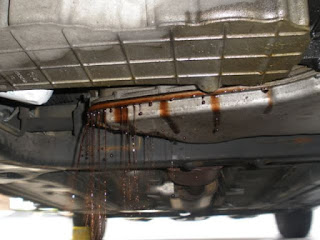
- Fluid will continue to drip or “rain” out for some time.
- Take the pan and gasket away outside somewhere to clean it up. In another plastic tray hold the pan up vertical with the magnet at the bottom and spray it with Brakleen back and forth from top to bottom making sure it's dissolving the fluid and gunk out of the pan leaving a clean surface. You should be-able to see the brakleen evaporating leaving no residue and a perfectly clean pan.
- Put the pan on a clean surface facing down so nothing lands or falls into it. Avoid the temptation to touch or wipe it with a cloth.
Accumulators
- First the filter has to come off, it's held on by the neck, the plastic is on the brittle side so be careful with it. It took about 5 mins to wiggle it out, I used a screw driver to apply some downward pressure where the filter neck is, and I wiggled the other end of the filter with my hand, it eventually came off. Don't leaver the screwdriver against any of the exposed parts of the transmission, and especially where the pan and seal bolt together.
- Undo the 4 bolts shown, the pipe with the rubber join will just pop out, the other two will just pull out of the accumulator with a bit of wiggling as it's removed - these pipes are made of aluminum so be careful not to bend them, or they might grab and never come out.
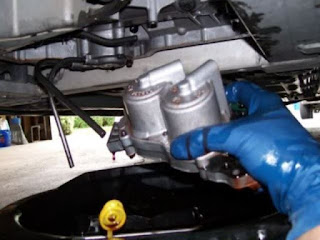
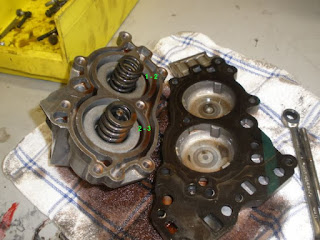
- When you undo the accumulator housing and remove the pistons, make a note of which one goes where, the springs are different! The 2-3 accumulator has the stronger thicker looking spring (in my case).
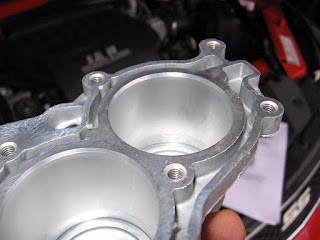
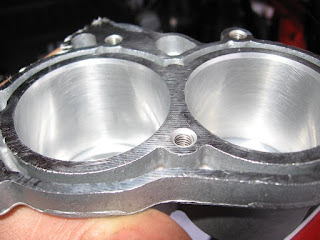
- The accumulator bores will be mirror smooth - the root of the problem!
- Service the accumulators by giving them a light scuff with the supplied Scotch Brite. Once done, give it a good dose of Brakleen.
Putting things back together
Try to get everything clean, and keep it clean.
The bolts that hold the accumulator together, and the 4 that bolt it to the transmission should be torqued to 97 inch pounds .
To put the new filter on, locate it and carefully tap the neck back into place with a plastic mallet.
The pan seal/gasket should be reusable if its the rubber coated steel type. Pan on, bolts in and done up finger tight, gradually tighten each bolt alternating between sides, then torque each one to 120 inch pounds, go around one last time to make sure you didn't miss one.
Just shy of 8 quarts came out. I put a full 8 back in:
Tip about 6 to 7 quarts back in, start the engine, go through the gears, check the level between putting about 1/2 a quart in at a time, until it's full, I then did a little forwards and backwards on the driveway, topped it off to full mark again, then took it for a drive, after that the last 1/2 a quart to the full 8 brought it up to about half way on the dipstick, and this is where I left it rather than crack the next bottle open.
Since the battery will have been disconnected for a while, the PCM will reset, gear shifts etc may be a little different for a couple of days until it's finished relearning.
Bolt Torque Settings
One thing none of them mention are the torque settings for the bolts:
You will need an inch pound torque wrench.
- 8mm socket and ratchet.
- 10mm deep well socket and ratchet.
- Torque accumulator bolts to 97 inch pounds.
- Torque pan bolts to 120 inch pounds.
I found the pan bolts on mine were barely tight when I undid them.


