Thursday, August 6, 2020

Report Linux IP, hostname & name servers

This script finds Linux hosts, and reports their IP address, FQDN hostname, name servers and outputs results in CSV format.

Details:
  • nmap is used to scan IP ranges for hosts listing on port 22, then
  • Remote ssh command is run to connect to each host, find FQDN (hostname -f) and configured name severs (resolv.conf)
  • This assumes the user running the script has the privilege to login to each host via SSH
  • The RSA key fingerprint prompt is auto accepted and the RSA key fingerprint is then discarded so that your ~/.ssh/known_hosts file is not filled up with hundreds or thousands of  RSA key fingerprints
  • Results are output to CSV file.


Windows DNS Server Query Stats

Generate reports from Windows DNS servers showing client query statistics. This will simply show the IP/hostname of the client, and how many queries it has generated. We used this to track down what was talking to our Windows DNS servers as part of a network migration project.

Uses Windows DNS server debug logging and Microsoft Log Parser 2.2.

DNS servers output log to local storage, log directory is shared read-only.

An intermediate host is used to run a PowerShell script via Task Scheduler that reads the log over the network, parses it and outputs a CSV and HTML report for easy viewing. This removes the need for DCs / DNS hosts to run a script and users to login to them to retrieve the report.

The script is configured to only parse the log if has been X number of hours (e.g. 12) since the last report was generated and if the log file is over X (e.g. 50mb) size. The Windows DNS server debug log is cleared and started fresh when max log size is reached (this is by design). This way we can schedule the script to run every few minutes, and capture a reasonable amount of data a couple times a day, if nether condition is met, the script does nothing.

The scripts I assembled plus config info can be found at https://github.com/lonney9/WindowsDnsServerReporting 


Friday, June 19, 2020

Setup free Cloud VPN with Ad Blocking

Use Oracle Cloud always free tier, OpenVPN, Pi-Hole, and Quad9 DNS to setup your own ad, tracking, and malware blocking VPN!

Oracle Cloud offers an always free tier option which includes the ability to provision up-to two Linux VMs (from a choice of distributions) with 1 GB memory, 50 GB storage each, and public IP addresses. Ideal for this type of work, and considering these VMs are running on HA (high availability) hardware in a datacenter with redundant power and network links makes it hard to beat for the price!

Together with Pi-Hole and OpenVPN which has clients for Windows, macOS, Linux, iOS, and Android it's fairly easy to setup and get working.

Oracle Cloud VM


Go-to https://docs.cloud.oracle.com/en-us/iaas/Content/home.htm to learn about the services, how to get setup with the free account, and Launch a Linux instance guide which will walk you through getting a VM up and running with networking, which you can then SSH into.

When creating a VM the default image is Oracle Linux. I chose the Ubuntu 20.04 image (not the minimal one), as I'm most familiar with Debian/Ubuntu.

Once a VM is up and running, and logged in via SSH, update the system and reboot:

apt-get update
apt-get upgrade
reboot

Installing OpenVPN


I went with the defaults except it does not detect the public IP of the Oracle cloud instance, manually enter that. For the DNS servers, I prefer Quad9 which blocks known Malware domains and doesn't log. This selection doesn't matter too much because we're going to change it later to use the DNS server Pi-Hole installs, which I choose Quad9 for upstream DNS.

After installing the script prompts to setup a user and outputs a config file for the client.
  • Port 1194 has to be enabled via the Oracle Cloud Console > Networking > Virtual Cloud Networks > [network name you created] > Public Subnet > Default Security List > add a rule for UDP port 1194 (stateful).
  • Angristan's OpenVPN install script made the necessary changes to iptables and everything just worked.
  • Note that the default iptables contains a number of rules for the iSCSI boot block volume, do not clear the iptables rules or modify these rules. More info in Oracle-Provided Images > Essential Firewall Rules.

After installing OpenVPN, I tested it with the defaults before moving on to installing Pi-Hole.

Note: This OpenVPN install script creates a pair a iptables scripts that are run when the OpenVPN service starts and stops. One adds rules, one removes them:

/etc/iptables/add-openvpn-rules.sh
/etc/iptables/rm-openvpn-rules.sh

Be aware these use the -I option to insert the rules at the top of their respective chains, if like me you have some geo whitelist and tor exit node block ipsets being inserted under the "related, established" connection tracking rule (usually 1st) 2nd and 3rd, then you may want to insert the INPUT rules further down by increasing the number after INPUT, e.g:

iptables -I INPUT 7 -i ens3 -p udp -m udp --dport 1194 -j ACCEPT
iptables -I INPUT 8 -i tun0 -j ACCEPT


There is also PiVPN (better to install it after PiHole if used) which will run on any Debian based system, not used or tested it yet, just making a note of it.


IPv6

The Oracle VM doesn't offer IPv6 (fine by me for now), however I found that on some operating systems if the local network assigned a valid routable IPv6 address it would prefer that and bypass the VPN.

To close that off, in the server config add:

push "block-ipv6"


DNS Servers

I also found that on Apple devices, if you push a private IP for primary DNS (like above with 10.8.0.1), and a public IP for secondary DNS - both are queries, and if the results dont match (because the private IP primary DNS is being filtered by Pi-Hole), then it will use the result from the public secondary!

This effectively bypasses the VPN for DNS, ads and junk will appear.

Only push one DNS server!


Installing Pi-Hole


Install methods are listed at https://github.com/pi-hole/pi-hole/#one-step-automated-install, I use the curl command.

The Pi-Hole script offers a list of upsteam DNS servers to use, I prefer Quad9 as they block known malware domains and don't log.

Configure Pi-Hole to listen on all interfaces, by default it picks an Ethernet interface, go-to http://10.8.0.1/admin > login > Settings > DNS > Listen on all interfaces.

Update OpenVPN server configuration to push the VPN tunnel IP for DNS, edit /etc/openvpn/server.conf Comment out the preset servers and add:

push "dhcp-option DNS 10.8.0.1"
# push "dhcp-option DNS 9.9.9.9"
# push "dhcp-option DNS 149.112.112.112"

Restart OpenVPN server:

systemctl restart openvpn@server

Logging


If logging is a concern, this can be disabled.


sudo pihole logging off

In the Pi-Hole interface, Settings > Privacy > Anonymous mode


sudo service pihole-FTL stop
sudo rm /etc/pihole/pihole-FTL.db
sudo service pihole-FTL start

Clear out archived copies of /var/log/pihole.log with

sudo rm /var/log/pihole.log*

This will leave basic stats available on the dashboard, but wont log or display anything specific about clients or DNS queries.

I "think" that is all that is required, searching for info on how to turn off logging doesn't turn up info / explanations on how-to clearly and fully do this in one place.

Automatic Updates


The Oracle Ubuntu image appears to be partially setup for automatic updates, it was already installed and had a config file present.

The options I configured in /etc/apt/apt.conf.d/50unattended-upgrades were:

// Automatically reboot *WITHOUT CONFIRMATION* if
//  the file /var/run/reboot-required is found after the upgrade
Unattended-Upgrade::Automatic-Reboot "true";

// Automatically reboot even if there are users currently logged in
// when Unattended-Upgrade::Automatic-Reboot is set to true
Unattended-Upgrade::Automatic-Reboot-WithUsers "true";

// If automatic reboot is enabled and needed, reboot at the specific
// time instead of immediately
//  Default: "now"
Unattended-Upgrade::Automatic-Reboot-Time "10:00";

Note the time is in UTC (assuming it's the default timezone in Oracle Cloud VMs). 10am UTC is 2am Pacific Time in my case.


Incidentally I found when trying to get automatic-updates working on my Raspberry Pi that it doesn't work, the config file needs to be edited - https://raspberrypi.stackexchange.com/a/102350


Some more info on automatic-updates


Pi-Hole Updates


Running pihole -up manually will update the Pi-Hole software.

To automate it, sudo -i to switch to root, crontab -e to edit the crontab, and enter:

# Pi-Hole weekly update
0 11 * * 0 /usr/local/bin/pihole -up > /var/log/pihole-up.log

Minutes, Hours, Days of month, Months of year, Day of week, Command, What to do with the output.

This will run the update at 11:00 am once a week on Sunday (day zero of the week) in the timezone of the machine, since mine is UTC and I'm Pacific time -8 hours this is 3am every Sunday morning. Output the results to /var/log/pihole-up.log. Plenty of crontab generators online.


Speedtest


Speedtest-cli is a command line speed test tool (requires Python). From the VM it reports 420 to 490 mbps in both directions. Over the VPN tunnel I get up-to 100 mbps.


Additional Block Lists

Additional block lists can be added via Group Management > Adlists

These don't seem to be an exact science, DYOR.

See:


Enable client to client communication

In /etc/openvpn/server.conf add an entry/line with: client-to-client

Add an iptables forwarding rule to enable traffic to pass out of and back into the tun0 interface:

iptables -A FORWARD -i tun0 -o tun0 -j ACCEPT

I later found I didn't need this rule, maybe a system reboot after the addition of client-to-client to server.conf works on its own?

Restart OpenVPN server and check status: 

systemctl restart openvpn

systemctl status openvpn


Multiple Instances for both UDP and TCP

(Rough notes)

By default OpenVPN is setup to listen on UDP port 1194, UDP is preferred as its more efficient and any TCP traffic being tunneled will handle dropped packet retries.

Some networks may block outgoing UDP traffic and/or limit traffic to web browsing only on TCP ports 80 and 443.

A work around is to enable multiple instances of OpenVPN server, one listening on UDP and one on TCP port 443 which is least likely to be restricted.

Copy /etc/openvpn/server.conf to /etc/openvpn/server2.conf

Edit the original server.conf change dev tun to dev tun0.

Edit server2.conf:

  • Change dev tun to dev tun1, 
  • port to 443 and proto to TCP
  • Change the server line to use a new subnet e.g server 10.9.0.0 255.255.255.0
  • If clients are assigned static IPs configs in the ccd directory and ipp.txt, duplicate directory and files and update addresses with server configs referencing each one.

Start the new server: systemctl start openvpn@server2.service
Check the new server status: systemctl status openvpn@server2.service
Enable autostart with: systemctl -f enable openvpn@server2.service

Update the iptables rules in /etc/iptables/add-openvpn-rules.sh or /etc/iptables/rules.v4 to enable incoming connections on TCP 443 (depending on where this rule is added), and duplicate any rules related for the new OpenVPN subnet and new tun1 interface. (Need to add details).

Inter client communication (if needed) between each instance needs a pair of iptables rules to forward traffic between tun0 and tun1, e.g:

iptables -I FORWARD -i tun0 -o tun1 -j ACCEPT
iptables -I FORWARD -i tun1 -o tun0 -j ACCEPT

Edit or remove/add a new VPN client profile to duplicate it, edit the duplicated file and change proto to tcp and the port number on the remote entry, we have one profile for UDP, and one for TCP when needed. It may be possible to include several remote lines in one profile such as https://openvpn.net/faq/how-do-i-set-up-my-profile-for-server-failover/. (Need to test this and see if it'll work reliably).


Renew Expired Server Certificate

These will expire after 3 years (I found this out the hard way)!

https://github.com/angristan/openvpn-install/issues/1002#issuecomment-1229525488

Running those commands worked, no changed needed to clients - macOS or iPhone at least.

A later comment on that issue suggested using easyrsa renew, but I couldn't figure out what version of easyrsa I had.


Privacy Badger (EFF)

Adds and additional layer to the browser

https://privacybadger.org/

Saturday, April 11, 2020

40m Half-Square

Next on the antenna project list is a half square for 40m.

The half square is a simple antenna design thats been around for a longtime:
  • Offers good low angle gain with out the need for radials.
  • Little more than 1/4 wave high (40ft at 40m).
  • Current nodes/maximums are up high, compared to verticals this should have less interaction with near by structures on the ground and reduce noise pickup.
  • 80 degree beam-width, can be fed directly with coax at a corner, or voltage fed at the bottom of one leg. I coax fed mine and put a 1M (million) ohm 5W metal film resister across the feed-point to bleed off any static buildup.
  • Only down side is the bandwidth is a bit narrow in the model, but in practice it was more forgiving.

More reading by people smarter than me:


EZNEC Model: 40m Half Square.


Locations of available trees dictate running the antenna near north/south, the broadside will be near east/west. Plotting the bi-directional 80 degree beam-width on an Azimuth map from my location reveals some useful coverage, a good portion of the Pacific, Australia and Alaska, to the east it'll cover pretty much all of the lower 48, Canada, South America and South Africa:


I've had the antenna up for a few days, on JS8Call where I'm most familiar with what I can hear, this antenna has shown it's DX potential on 40m overnight, with more stations spotted across the Pacific than with the OCFD. Down side is performance (as expected) with closer in stations (~1000 miles) are weaker.

The SWR bandwidth is broader than the model, it's quite usable across 40m with it centered around 7.160 MHz.

IC-7300 SWR Plot - 40m Half Square

Noise pickup is negligibly different compared to the OCFD, a stark contrast to the ground mounted 43ft vertical I had up a while back which was very noisy on receive in my city location.

If I had the room for more than one wire antenna I'd keep this one up, however it's a single bander. The OCFD is back up for now..


The half square can be taken a step further for some real gain (~6dBi at 20 degrees) on the low bands by adding a second one as a reflector, VA7ST built one - A cheap 40m DX machine: the twin half square array, a copy of the defunct Cebik link referenced can be found at https://antenna2.github.io/cebik/content/ao/ao11.html. 

Phasing them is also a possibility - Phased Arrays - 40m Twin Half Square.

Unfortunately I don't have the room for one of these on 40m.

Models are good starting point, and a way to investigate and better understand antenna systems. These tools can also help guide us to and validate the final result, if a good correlation is observed in the real world then we can have confidence the patterns and other information are accurate.

The models I have created and made available may contain errors, or overlook something someone more experienced can see. I don't claim to be an expert or authority on the subject of antenna modeling or phased arrays. I simply want to further my own knowledge and understanding of antennas which I find fascinating. Comments, suggestions, discussion are welcome - lonney@gmail.com.

This post is one of several on Phased Arrays.

Friday, March 13, 2020

Mobile HF/VHF/UHF Install


Icom IC-7100 install I did in my 2013 Chevy Impala LTZ covering 2m/70cm, and HF.


My main sources of information were:
  • K0BG.COM - dedicated to mobile amateur radio operators, ABCs is a good starting page.
  • Mobile Radio Systems (QRZ forums) is a good place to search for info, and post questions.


Choosing a Radio


K0BG has a good page called Miniature Radios which covers all the usual suspects.

The Icom IC-7100 is my choice for mobile, covers 160m thru 2m, and 70cm, all modes. DSTAR is an added bonus.

It's well worth spending a few bucks on rtSystems programming software, you can buy it and download it directly from them and use the supplied Icom USB cable.


QST July 2014 review of the IC-7100 available at

KV5R wrote a review covering both the good points and annoyances at
https://kv5r.com/ham-radio/2018-projects/icom-ic-7100/

Several more Icom IC-7100 reviews can be found online.


Daughter investigating the IC-7100


Radio Mounting


Radio mounted under the center console where it meets the dash, my 2013 Chevy Impala has an ideal space for a radio of this size to fit in there and easy access for the cabling. I also got the optional mounting bracket to maintain an airspace around the radio.

Control head mounting took some research, in the end I settled on a Ram Mounts RAM-B-102-UN10U. The "large phone/phablet" grip will hold the oddly shaped IC-7100 control head, makes it easy to remove and reposition.


Power Cabling


K0BG covers the important details in Wiring & Grounding.

I used the following items from Powerwerx:

Finding a way through the firewall in a 2013 Chevy Impala, the 2000-2005, and 2005-2013 W body Impalas use the same chassis, they have a rectangle rubber plug that can be pulled out in the passenger footwell just under the top of the carpet.

I poked a hole in the top right corner through the rubber boot with a screwdriver, then taped the power cable and coax to a piece of wire and fed it through.

Where it exits in the engine bay is close to the power steering pump pulley, I was able to cable tie the power cable and coax to the factory loom, there is enough space to freely run it between the factory loom and the firewall following the loom up with out coming into contact with anything.

Once I had the cables through, I cut a notch out of the rubber plug to allow room for the new cables and reinstalled it, I later realized I should have put a blob of RTV silicone around where the cables pass through the boot to seal it.. I might apply some coax seal when I get the chance to jack the car up again.

Pictures, note the pics of the cable passing through the firewall into the engine bay I took when pulling the cables through, as noted above they are neatly cable tied to the firewall side of the factory loom.


Power cabling and coax is neat and out of the way, and cable tied to the factory loom that passes through the firewall.


Antennas and Mounts


VHF/UHF:
  • Larsen NMO 2/70 antenna I've had for a few years.
  • The NMO Mount from Amazon, this one appears to good quality. I sealed where the coax is crimped with some RTV silicone and heat-shrink tube over the top.
  • I mounted this one on the front left (passenger side) fender with an NMO L bracket.
  • The coax is pre crimped into the NMO mount, I cut the coax about 1ft from the NMO mount, and pulled it through the firewall with the power cable at the same time, I then fitted an N-type female to the NMO end and N-type male connector to the other. 

HF:
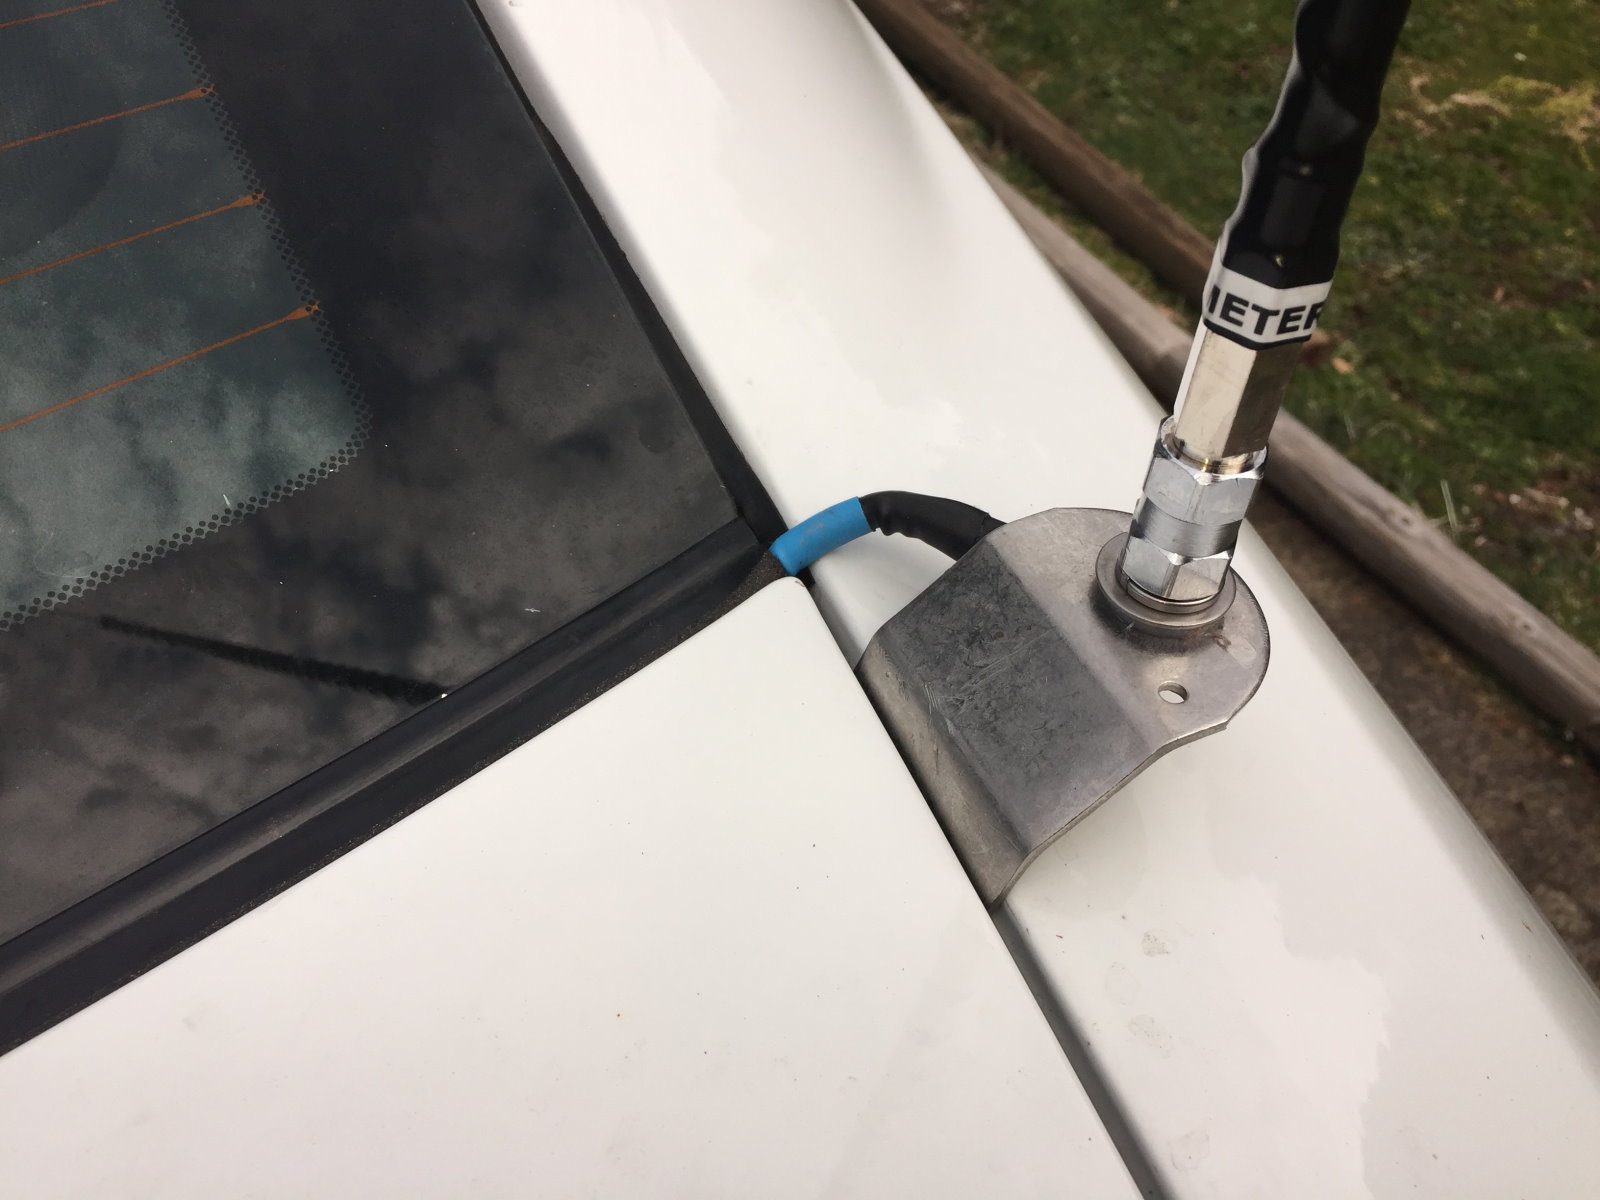
  • I used this Firestick 3/8 x 24 stud and mount from Amazon. Mounted this on the rear left of the car.
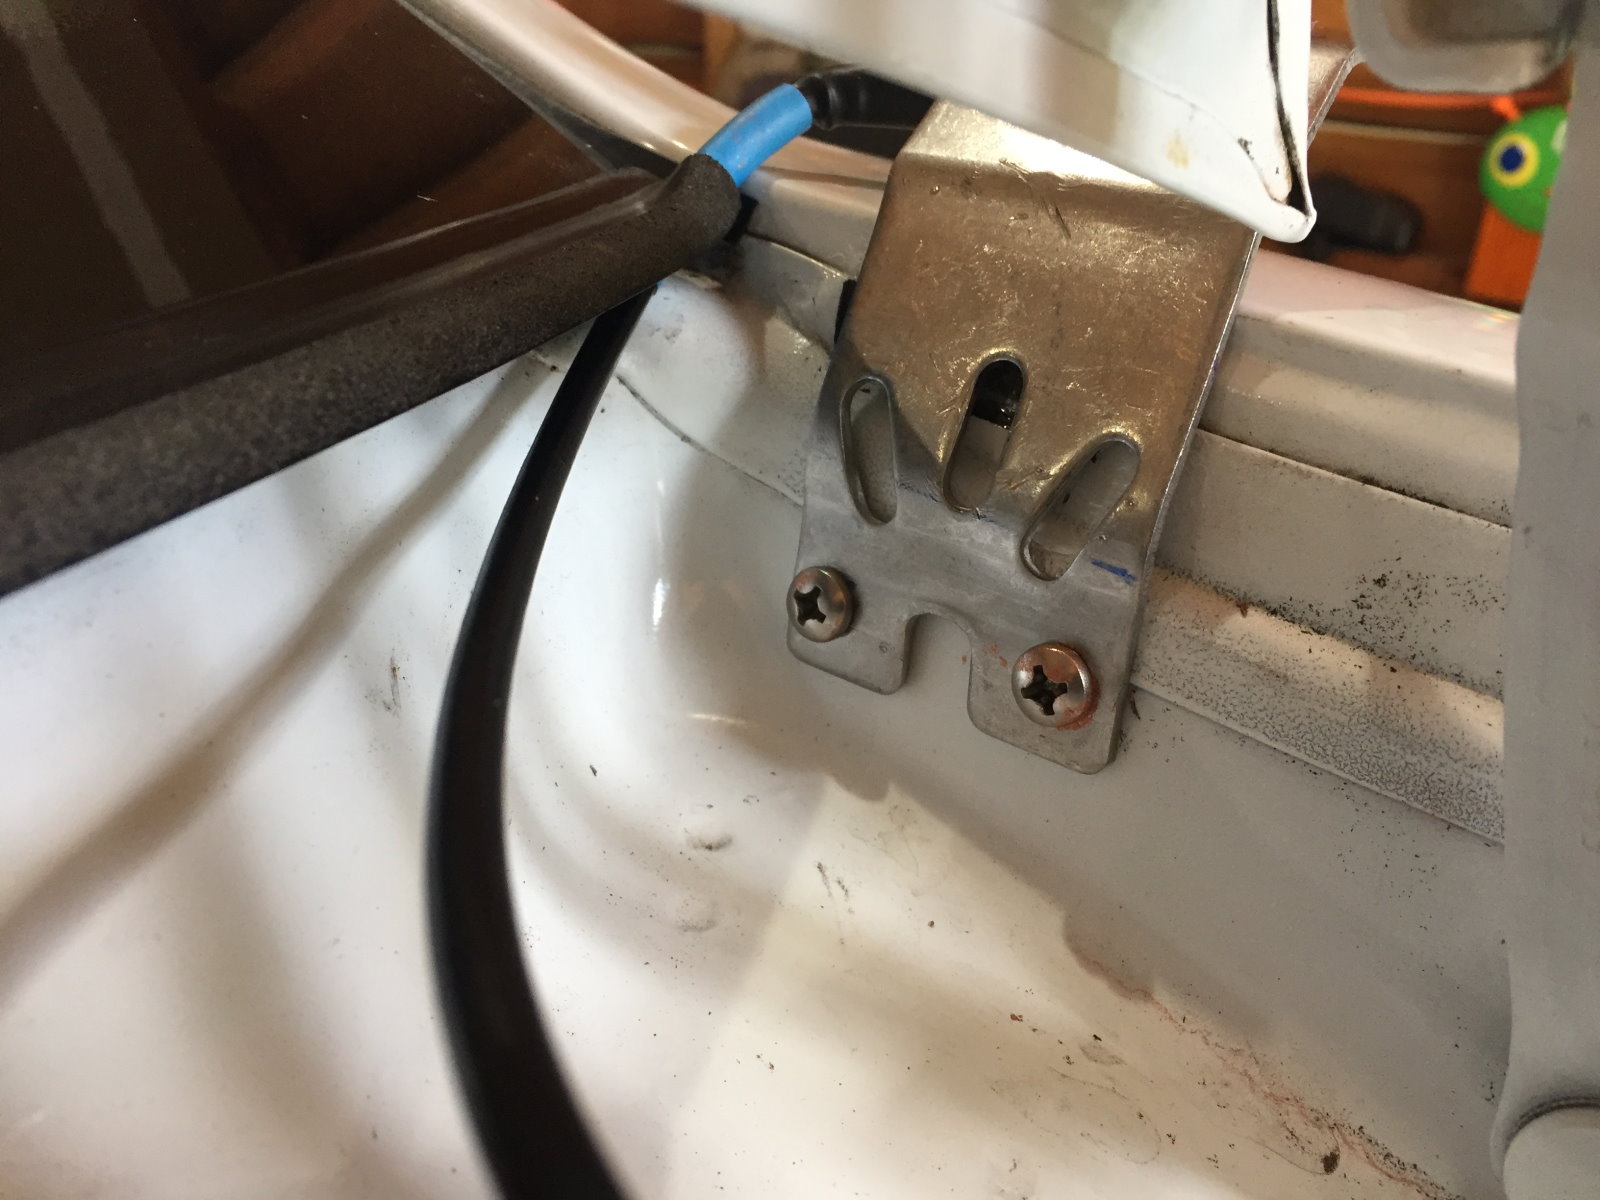
    • The shape of the bracket had to be modified slightly, I had to flatten the bottom L, and adjust the angles of the other bends to get the bracket to lean outwards to clear the trunk lid gap and maintain a level mounting for the antenna. I skillfully did this with a block of wood and a sledge hammer - no joke.
    • I coated the screws with "Jet-Lube SS-30 Pure Copper Anti-Seize 12555" to prevent rust and maintain a good electrical connection. 
  • For coax I used RG-8X I had spare, this runs from the center console, under the passenger seat, under the trim to the back seat and into the trunk.
  • Single band Hamsticks - HRO sell MFJ and Shark Antenna versions of these, I got the Shark!
  • I tried and failed to get a shunt inductor to match per Antenna Coil Adjustment. So I opted for the MFJ-907 UNUN. The short coax jumper between the UNUN and antenna is RG-58.
  • Radio side of UNUN is 7 turns of coax through a pair of 3/4" mix 31 clamp on ferrites from Palomar Engineers. No common mode currents here!
  • Grounding braid to bond the hood and trunk lid, HRO sell ABR industries 233/2-G4-10 - 10ft 1/2 inch braid with nickel grommets. 
  • K0BG covers bonding and grounding in detail.
  • I'd like a screwdriver antenna, my choice would be the Little Tarheel HP.


SWR 20m:


SWR 40m:


3/8 x 24 Mounting bracket on trunk / left rear:


Used a spare plastic cap off a some connectors/adapters I had got at some point and kept, this keeps the water out of the 3/8 x 24 stud when the HF antenna is not on the car.

I also later drilled a 3rd hole where the inverted U is in the bracket between the sheet metal screws, and used a bolt with large washers + nylon nut to "clamp" the bracket to the car body.

The ring terminals I waterproofed with coax seal, and three different sizes of heat shrink tube overlapping and RTV silicone between the second two pieces to ensure water tight sealing.

That "reshaping" of the bracket could be much better, but all I had on hand was a sledge hammer, some wood, G clamps, and some ingenuity.. 

APRS over HF Mobile? You bet! See HF APRS With JS8Call.

The Final Product


Disclaimer: None of this is an endorsement of specific items, suppliers or manufactures, it's what I decided to use based on available information, personal preference, and/or what I already had.